-

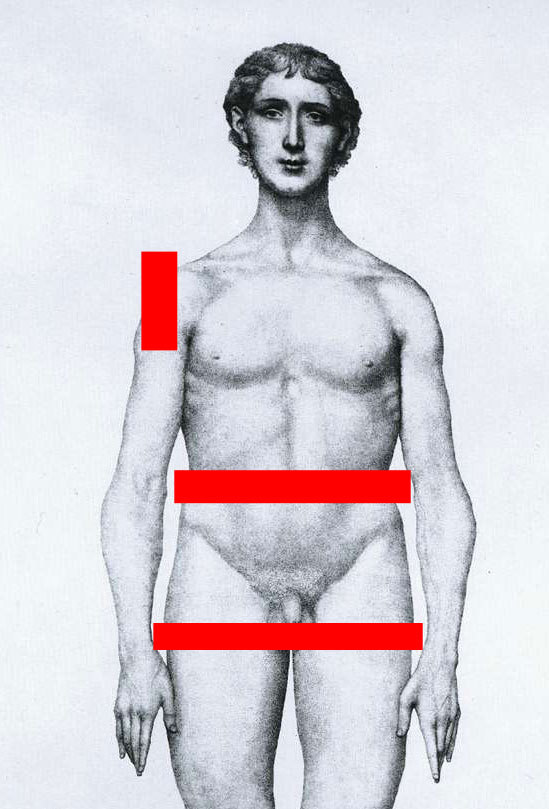
- Nude Dude
-
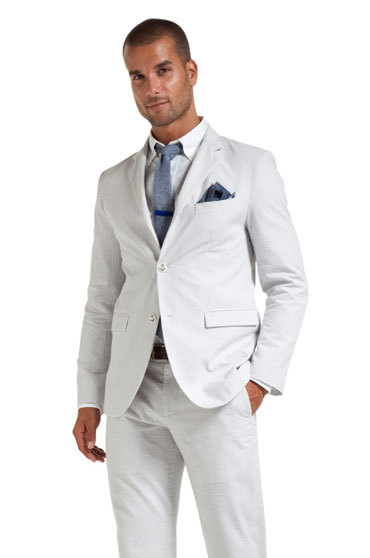
- Pro Photo
-
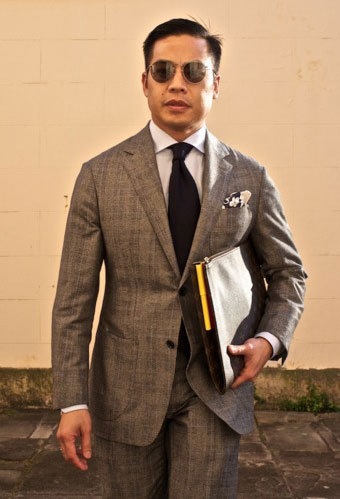
- MistahWong
I want to highlight a few fit mistakes I see all too often on men in the street – and even in professionally-styled photos. To help, I’ve created one of the most brilliant Photoshop illustrations of all time to serve as guide – I call him Nude Dude. I’ve also presented a professionally-shot and styled photo that mostly gets it wrong (Pro Photo), and a picture of our friend Mistah Wong getting it right.
Here are three important points of fit:
- The waist. The center button of a three-button jacket and the top button of a two-button jacket serve as fastening point. Their placement is vitally important. It should be on the waist. See that red line running across the top of Nude Dude’s hips, right around his belly button? That’s the waist. This is where you want the sides of your jacket coming together, just above the hips, where your body heads back out. Remember that a longer line in the upper body makes you look taller and stronger.
If you look at Pro Photo, you’ll see that the waist button is nearly at the model’s sternum. If you’re thin and have narrow shoulders, your jacket will hang more or less straight down, and this will be less of an issue, but if you’re a man, with a little extra volume in the chest or gut, it’s a problem. Current fashion favors high-to-very-high waist buttons. You can see that even this model looks awkward.
Compare to our friend MW. His buttoning point is still on the high side in a nod to current styles, but not absurdly so. Keeping it around the waist flatters his grown-up body. MW isn’t a skinny teenager, and he has no reason to want to look like one. Or worse, like he’s trying to squeeze into a teenager’s ill-fitting clothes.
- The length. The general rule of thumb is that a jacket should cover your rear. I’ve drawn a big red line on Nude Dude to illustrate the approximate placement. You can go a little longer, but you should be careful to make sure your legs don’t look shorter than your upper body.
Our friend Pro Photo’s jacket barely reaches the bottom of his fly. It’s a little unflattering to a model, but very unflattering to anyone with some meat on their bones.
MW’s coat is similarly styled – but it actually fits his body. Note that even from the front view we can see that it’s relatively longer. This makes him look leaner. MW isn’t especially tall, so he wants to balance a longer torso and a longer legline, and he does it very well here.
- The shoulders. Like all these elements, shoulder width is affected by style and trends. No matter what the style, though, the fit of your jacket’s shoulder should flatter your natural shoulder line without looking artificial.
If you pat the side of your shoulder, with your hand perpendicular to the ground, you should be able to feel first the jacket shoulder, then within half an inch or so, your actual shoulder. A soft shoulder must be very close, a more padded shoulder has a bit more leeway – but it should still be extremely close, even in an exaggerated silhouette.
A stronger shoulder, as was favored in the 30s & 40s and again in the 70s and 80s, makes for a strong silhouette. Still, the shoulder line should be clean and natural-looking. All the tucking and pulling going on in Pro Photo makes it tough to tell for sure, but those weird ripples may be a sign of a shoulder that’s a little big and a little ill-fitting. Either way, he’s not too far off in this department.
Mistah Wong’s shoulder line is very soft – both the Neopolitan and American Ivy League styles favor soft shoulders, in contrast to the British – but see how it naturally follows his real shoulder line? At the same time, it smooths and flatters that line. With a soft, sloping shoulder he looks less “strong,” but more relaxed and comfortable.
These are three points of fit that are essentially inalterable, and they’re three I see men blithely ignoring every day. Hopefully this will help you look your best!