With so much more time at home, I’ve been using the opportunity to take care of some household chores. Over the weekend, I vacuumed up the back of my closet, wiped my sleeves, and sprayed the floorboard with Cedarcide (a pet-safe preventative measure for killing clothes moths). In the United States, April is the National Hatching Month for clothes months, which means now is about as good of a time as any to take care of some wardrobe cleaning. If you need tips, we once interviewed Camille Myers Breeze, a textile conservator with decades of experience. If anyone knows how to preserve precious textiles, it’s her.
This is also an excellent time to take care of your shoes. From now until April 7th, Carmina is holding a shoeshine marathon on Instagram, where you can show off your work. The top three entries, as voted on by the community, will also win prizes (although the prizes have yet to be announced). Just tag your entry with the hashtag #Carminashoeshinemarathon to participate.
For a full in-depth guide on how to shine your shoes, you can revisit our interview with Gou Ishimi and Naoki Terashima, winners of two Japanese shoeshine competitions. The Hanger Project also once published a video on their technique, and I once gave five tips for a better shoeshine. Of course, Jesse also showed his routine in our webisode on shoes.
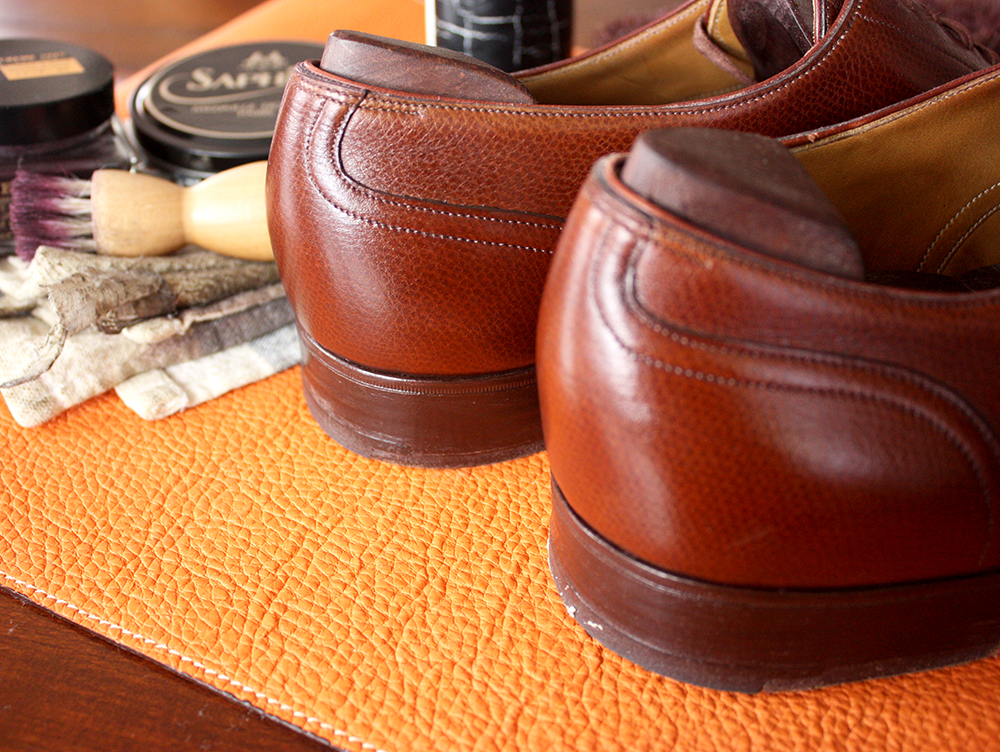
I admit, my normal shoe care routine is very simple. It revolves around the very basic principle of “how do I get this done as quickly as possible, as I don’t actually like shining shoes.” For an everyday routine without the fuss and bother of re-coloring your sole edges or building a mirror shine, I think these steps are best. It may not win you an award in Carmina’s shoeshine competition (or, it may), but you’ll definitely wind up with better looking shoes. I’m starting today with a pair of dusty split-toes I’ve had in seasonal storage.
The Most Important Step: Leather Conditioner
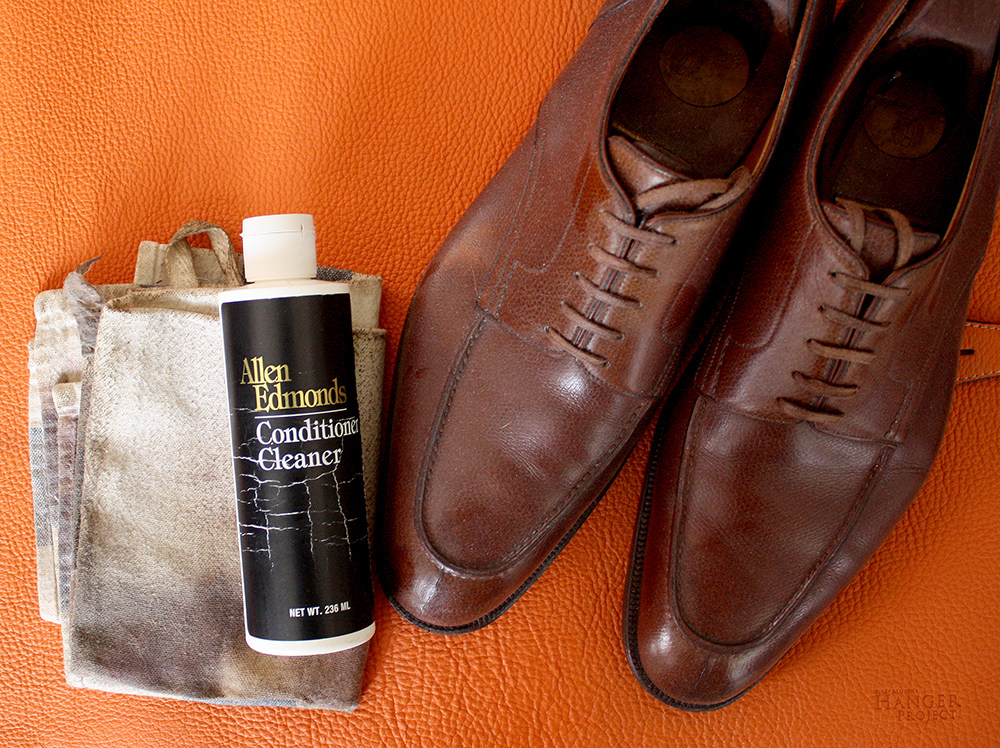
Routine application of leather conditioner will do more for the health and appearance of your shoes than anything else. It will help bring out the suppleness and richness in the leather, give the color some depth, and most importantly, prevent your uppers from drying out and cracking. You don’t have to apply leather conditioner often — only when the leather starts to look a little dry. But like Brylcreem, a “little dab will do ya.” Put a small pea-sized drop on a rag and spread it over each shoe. My leather conditioner of choice is Allen Edmonds, but it looks like the company may have reformulated their conditioner. Guys who argue about this stuff online often recommend Bickmore’s Bick4.

You’d be surprised what leather conditioner alone can do. In the photo above, I’ve removed my shoelaces, brushed my shoes down with a large horsehair brush, and applied a few coats of leather conditioner. You can already see how the conditioner helps bring out the leather’s color and luster. Just compare the photo above to the image at the top of this post, when the shoes were dusty and dull.
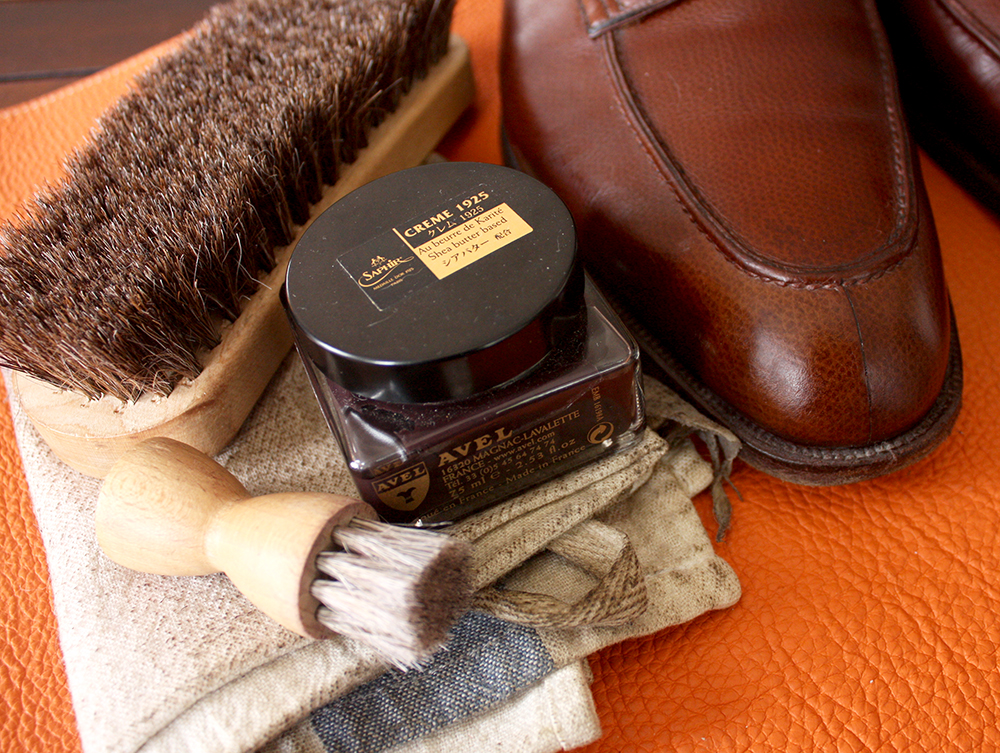
For a Light Shine, Apply Cream Polish
Now it’s time to apply shoe polish. I use the small brush you see above, which is called a dauber, and begin with cream polish as a base. One of the advantages of cream polish is that it has more color pigments than wax, which can help build up that beautiful depth of color that people online often call a patina. The general rule is that you want to choose a cream polish that’s as close in color to your leather as possible, but don’t worry about matching. You won’t want to use black polish on tan shoes, but something ever-so-slightly darker will help you build a bit of depth in the leather’s color.
The other advantage of cream polish is that it further conditions your shoes. Granted, if you’ve already conditioned your shoes with a proper leather conditioner, you can always jump to a wax polish. But I often use the two in connection to get an added depth in color.
Using a dauber, spread a small amount of cream polish on your shoes and then brush them out with a large horsehair brush. Do this until you see a light shine. On very casual shoes, such as penny loafers, you may want to stop here. Sometimes very casual shoes benefit from only have a very light shine, instead of something glossier.
Optional: Wax Polish
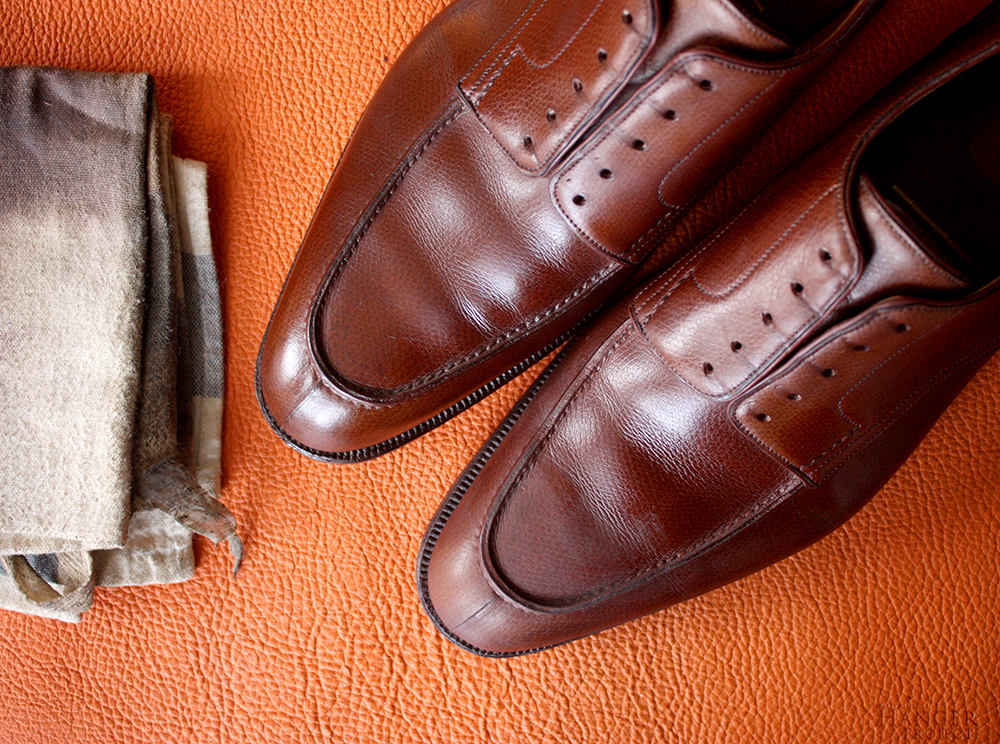
If you want to bring out the color some more, you can also use a wax polish, which often comes in a larger, flatter tin. Wax polish is excellent when you want to add a protective layer to your shoes, such as on boots that you might wear in the rain. They’re also good for building a glossier shine. In the photo above, you can see the difference. The top shoe has a wax polish, while the bottom shoe does not.
Here’s a trick when applying wax polish: think of this as layers. Full-grain leathers have very small, almost microscopic pores. When you’re building a shine, you’re essentially filling in those pores and making the surface glossy smooth. To do this, you don’t want to slather your shoes with wax. Instead, start with a tiny amount and use the large horsehair brush to spread it around. You want to buff your shoes until you see a light shine. Then apply another layer of wax polish and repeat. I usually apply three light coats.
You also want to keep wax polish away from areas where the shoe flexes. Unlike cream polish, wax polish hardens. If you apply it to areas where the shoe flexes, it’ll eventually crack. This won’t ruin your shoe, but it won’t make them look that great. And it may be a pain in the rear to remove. Instead, keep wax polish to the toes and heel. A very light wax coating on the vamp is fine, but you want to keep it to a minimum.
Now Admire Your Work
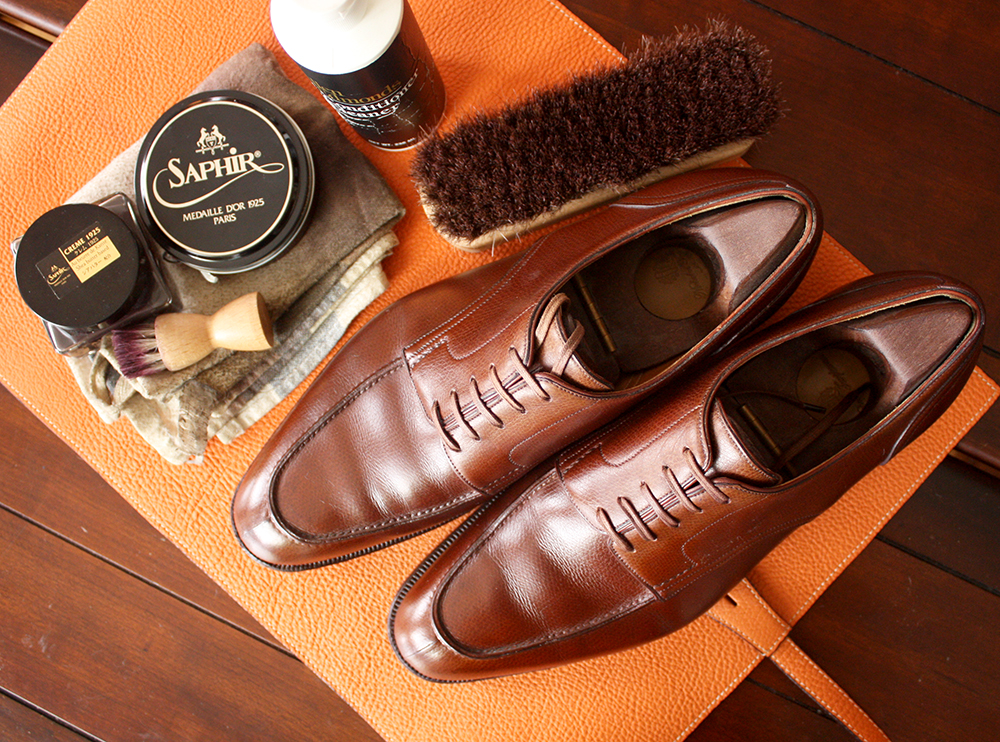
Now put your shoelaces back in, give your shoes a final brush, and admire your work. Online, you’ll often read people say that you need different daubers for different colors of shoe polish, so that you’re not mixing colors such as tan and black. I find that shoe polish comes off the brush pretty quickly with a quick rinse and some soap. You’ll have to wait overnight for the brush to dry, which may not be ideal if you’re polishing a large number of shoes. But for regular routines, a single dauber should suffice. The last step, of course, is taking a flick for the ‘Gram.
Items in this post:
- IKEA kitchen towel
- Saphir Médaille d’Or Pommadier cream polish
- Saphir Médaille d’Or Pâte de Lux wax polish
- Allen Edmonds horsehair brush
- Allen Edmonds dauber
- Allen Edmonds leather conditioner (no longer made)
- The Hanger Project leather shoeshine carpet
- Shoes by Nicholas Templeman